To add a floor drain to your sauna without a full remodel, start by choosing a location near water flow or the lowest point on the floor. Assess your floor material and verify it has or can be modified to slope at least 1/4 inch per foot for proper drainage. Gather the necessary tools and materials, then carefully cut and install the drain, connecting it to existing plumbing. Proper sealing and testing are key—keep exploring to learn more about perfecting your setup.
Key Takeaways
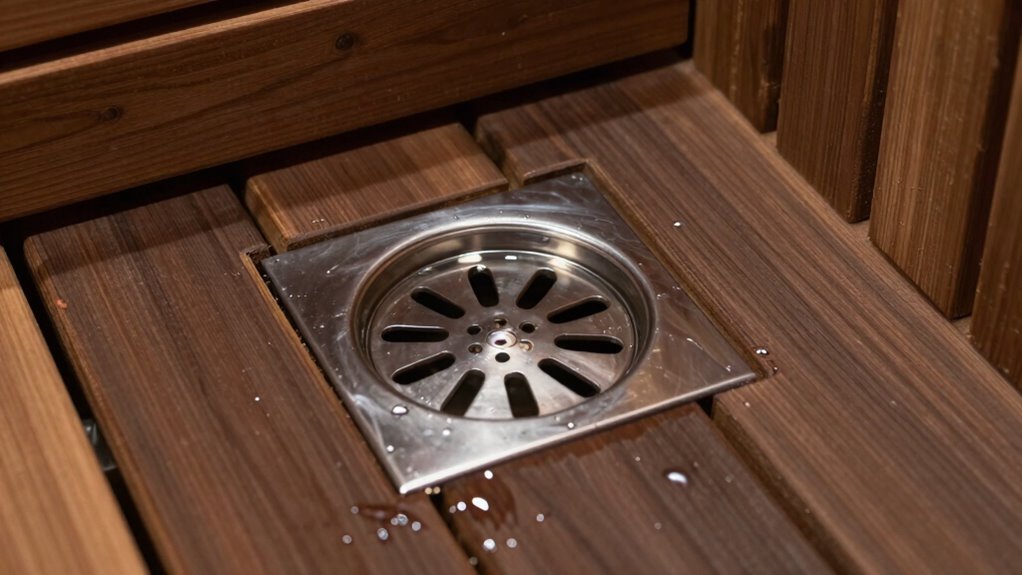
- Choose a low, water flow area near existing plumbing for easy drain installation and effective water removal.
- Assess the floor material and slope to ensure proper drainage and structural compatibility.
- Gather necessary tools and materials, including PVC pipes, sealant, a drain grate, and waterproofing supplies.
- Mark, cut, and connect the drain securely, ensuring proper alignment and waterproof sealing.
- Test water flow, verify proper slope, and perform regular maintenance to prevent leaks and ensure efficient drainage.

Freestanding Tub Drain Rough-in Kit, Bathtub Drain Kit with PVC Plastic Adapter and Brass Tail Pipes, Compatible with Freestanding Bathtub, Floor Mounted Bathtub and Copper Bathtub
【Compatible With】 : Freestanding Tub Drain Rough-in Kit is suitable for all freestanding bathtubs, floor bathtubs and island…
As an affiliate, we earn on qualifying purchases.
As an affiliate, we earn on qualifying purchases.
Why Adding a Floor Drain Improves Your Sauna
Adding a floor drain to your sauna considerably improves its hygiene and safety. It makes cleaning easier by allowing water, sweat, and debris to drain quickly, reducing mold and bacteria buildup. This not only promotes a healthier environment but also minimizes slipping hazards. Besides functionality, a floor drain enhances aesthetic appeal by creating a cleaner, more polished look—no water pooling or messes. It also supports ventilation improvements, as proper drainage helps control humidity levels, preventing dampness that can cause odors or mold growth. With a floor drain, your sauna stays fresher and more inviting, encouraging regular use. Overall, it’s a practical upgrade that boosts both cleanliness and comfort, making your sauna a safer, more appealing space. Additionally, high humidity levels can lead to an uncomfortable sauna experience, making proper drainage essential. Implementing a floor drain also helps to maintain optimal air quality, ensuring that your sauna remains a pleasant retreat. Moreover, this enhancement aligns with innovative digital concepts, showcasing how modern solutions can elevate traditional spaces. Furthermore, effective soundproofing techniques can enhance your sauna experience, creating a tranquil environment that allows for complete relaxation. Additionally, proper drainage can help prevent heatstroke signs by maintaining a more stable temperature and humidity level in the sauna.

Sauna Shield C2 Guard Exterior Sauna Wood Waterproofer & Sealer for Outdoor Saunas | Non-Film Forming, UV Resistant, Low VOC, Clear & Tint Options | Long-Lasting Weather Protection (Clear, No Tint)
Advanced Sauna Wood Protection – Defend your sauna’s exterior wood from rain, snow, and sun with a deep-penetrating…
As an affiliate, we earn on qualifying purchases.
As an affiliate, we earn on qualifying purchases.
Choose the Best Location for Your Floor Drain

Selecting the most suitable location for your floor drain is crucial to guarantee effective drainage and easy maintenance. You want to confirm the drain placement is positioned where water naturally flows or collects, typically near the shower area or lowest point of the floor. The ideal location minimizes water pooling and prevents damage to your sauna’s structure. Consider the layout of your sauna and identify a spot that allows for straightforward connection to existing plumbing. Additionally, consider the aesthetic appeal of the drain’s location, as it can enhance the overall design of your sauna. Keep in mind accessibility for cleaning and future maintenance. Avoid placing the drain too close to walls or corners, which can complicate installation. Additionally, ensuring proper filter sizing/flow is important for maintaining efficient drainage. Ultimately, choosing the right spot will make water removal efficient and keep your sauna dry and safe. Furthermore, having a well-placed drain contributes to luxury living standards by enhancing the overall experience of your sauna. Additionally, ensure that the area around the drain allows for proper water drainage systems, which can help in maintaining a clean and safe environment. Consider using water-cooled mattress pads to help manage humidity levels in the sauna for a more comfortable experience.

CKVIHAV 6Pcs 1/2 Inch PVC Pipe 17" Long Sch40 Industrial Pipes for Home DIY, Greenhouse, Garden, Farm, Workshop, Furniture Grade, White (0.50" x 17"L)
Size – Length of each: 17";The 1/2 inch Schedule 40 PVC pipe has an outer diameter of 0.84…
As an affiliate, we earn on qualifying purchases.
As an affiliate, we earn on qualifying purchases.
Evaluate Your Sauna’s Floor and Plumbing for Drain Installation
Evaluate Your Sauna’s Floor and Plumbing for Drain Installation
First, examine your sauna’s floor material and slope to guarantee proper drainage. Then, review the existing plumbing layout to see how it can connect to a new drain. This assessment helps you determine if your current setup supports an effective drain installation. Additionally, consider investing in high-quality plumbing gear to ensure durability and performance during installation. Incorporating auditory processing techniques can also enhance communication with contractors during the installation process. Understanding water chemistry principles is also beneficial, as it can help you maintain optimal water conditions in your sauna. Proper drainage can also help improve indoor air quality, reducing humidity levels that could affect the sauna environment. Effective drainage systems are essential for maintaining optimal hygiene standards in any sauna setup.
Assess Floor Material and Slope
Before installing a floor drain, it’s essential to evaluate the material and slope of your sauna’s floor. The floor material influences how easily you can modify or cut for the drain, so check if it’s concrete, tile, or wood. Concrete and tile floors are usually easier to work with, while wood may need reinforcement or additional waterproofing. Additionally, understanding cable failures in various environments can help you foresee potential issues. Next, inspect the floor slope; a proper slope directs water toward the drain. Ideally, the floor should slope at least 1/4 inch per foot to ensure effective drainage. If your floor isn’t sloped correctly, you might need to make adjustments or add a slight incline to prevent water pooling. Gauging these factors ensures your drain installation will work efficiently and last long. Additionally, keeping your sauna’s environment free of excess moisture can help maintain the integrity of the floor and prolong its lifespan.
Check Existing Plumbing Layout
To determine the best location for your floor drain, you need to evaluate your sauna’s existing plumbing layout carefully. Start by reviewing plumbing diagrams to understand how water flows and identify any obstructions. Check pipe sizes to guarantee they can handle additional drainage without clogging or backflow issues. Look for accessible points where the drain can connect without major modifications. Additionally, consider incorporating eco-friendly practices into your plumbing choices to promote sustainability. Consider the slope of existing pipes to maintain proper drainage. Also, verify if the current plumbing can support the added load without compromising performance. These steps help you find an ideal spot that minimizes disruption and ensures efficient water removal. Proper assessment prevents costly mistakes and simplifies the installation process, making your sauna safer and more functional. Furthermore, embracing calm and clarity through careful planning and execution can lead to a more satisfying installation experience. Additionally, utilizing trustworthy insights can enhance your decision-making when planning the installation. Understanding the importance of accurate measurements can also guide you in selecting the right drain size and placement for optimal performance. Moreover, ensuring the connection points are accessible plumbing options facilitates a smoother installation process.

Calvana 2 Pack 12 Inch Catch Basin Drain Grate, Fiberglass Reinforced Polyethylene Square Drain Cover for Yard Patio Driveway Drainage, Black
Reinforced Fiberglass Structure: Made from polyethylene reinforced with 20% fiberglass, creating a stronger storm drain grate compared with…
As an affiliate, we earn on qualifying purchases.
As an affiliate, we earn on qualifying purchases.
Get Your Tools and Materials Ready

Get Your Tools and Materials Ready
Getting your tools and materials together is an essential step to guarantee a smooth installation process. Proper material selection ensures durability and compatibility with your sauna’s setup. Additionally, understanding tool requirements helps you work efficiently and avoid delays. Prepare a list of necessary items, including a drill, pipe wrench, level, and PVC pipes. Consider these key points:
| Material Selection | Tool Requirements |
|---|---|
| Waterproof sealant | Pipe cutter |
| PVC piping and fittings | Teflon tape |
| Drain grate and cover | Measuring tape |
| Pipe connectors | Safety gloves |
| Adhesives and primer | Drill with appropriate bits |
Having these ready minimizes interruptions and keeps your project on schedule. Remember, using the right safety tips can greatly enhance your DIY experience. Additionally, selecting high-quality smart home gear can streamline your sauna maintenance and enhance functionality.
Install Your Floor Drain Step-by-Step
To install your floor drain, start by gathering all the necessary materials and tools. Next, mark the spot on your floor where the drain will go, then carefully cut the opening. Finally, connect the drain properly to your plumbing to guarantee smooth water flow and prevent leaks. Additionally, ensure that you strain your paint before applying any coatings in the sauna area to achieve a smooth finish and avoid clogs.
Gather Necessary Materials
Before you start installing your floor drain, gather all the necessary materials to guarantee a smooth process. Having everything on hand prevents delays and ensures a seamless installation. You’ll need a durable drain, preferably with decorative covers to match your sauna’s aesthetic. Make sure to include appropriate waterproof sealants and fittings for secure connections. Also, consider tools like a saw, level, and screwdriver for precise installation and proper alignment. Don’t forget to have some drain maintenance supplies, such as brushes or cleaning agents, to keep your drain functioning smoothly over time. Planning ahead with these materials will help you avoid repeated trips and ensure your new floor drain is both functional and visually appealing.
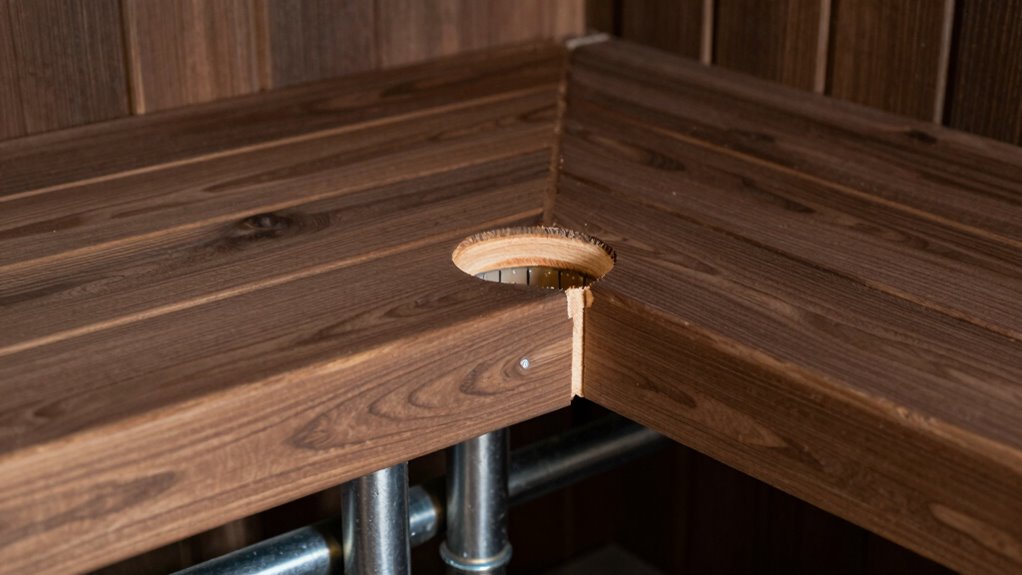
Mark and Cut Floor
Once you’ve gathered all your materials, it’s time to mark the spot where you’ll install the floor drain. Use a measuring tape to locate the most suitable position, ensuring proper water flow toward the drain. Mark the outline of the drain with a pencil, considering the size of your decorative grate and drain cover. Double-check the placement to avoid interference with sauna benches or walls. Next, use a saw or chisel to carefully cut along your marked lines, creating a hole that fits the drain assembly snugly. Be precise to prevent gaps or uneven edges. Once the cut is complete, clean the area thoroughly. This guarantees your decorative grate fits securely and the drain cover sits flush, ready for the next installation step.
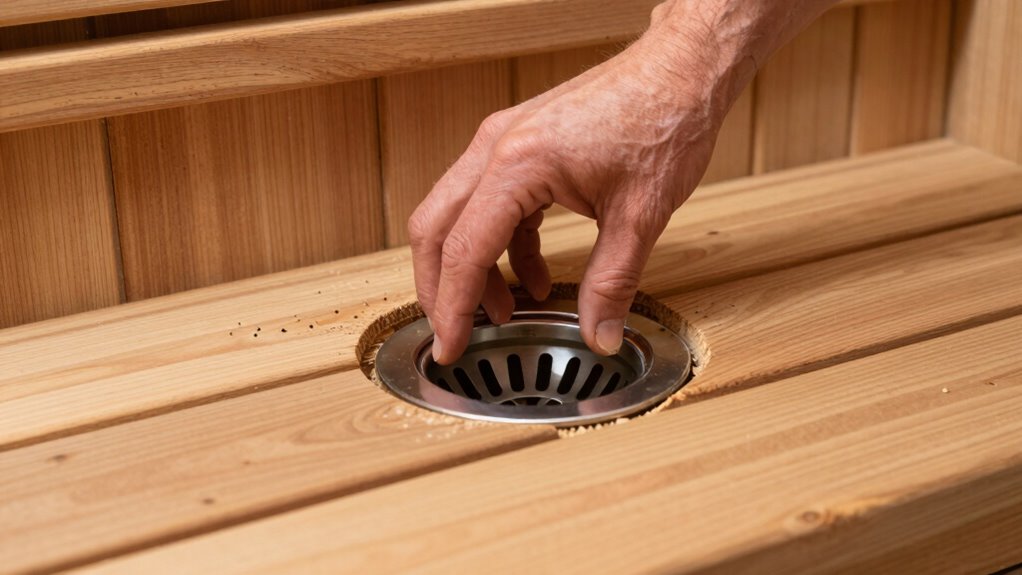
Connect Drain Properly
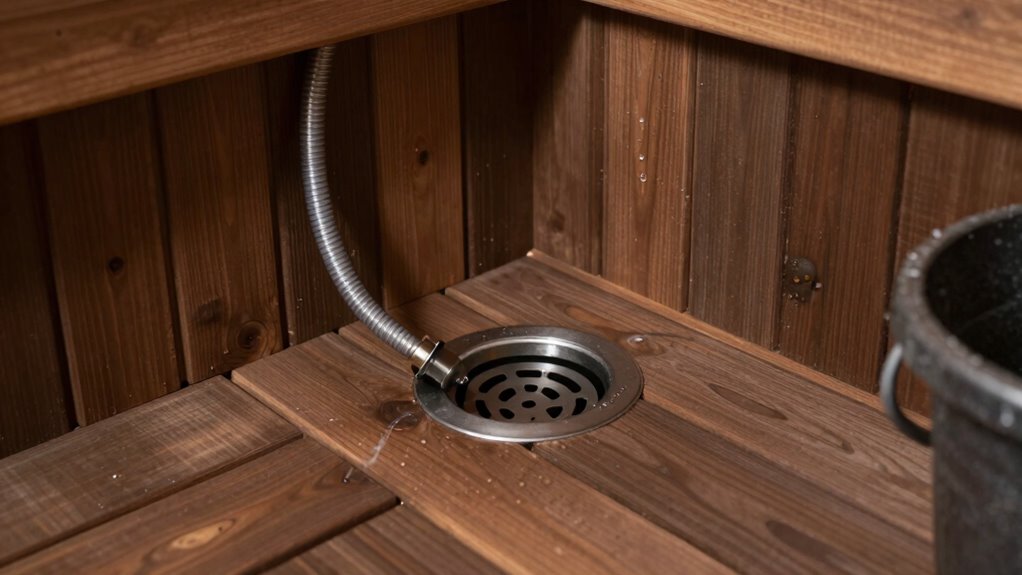
After fitting the drain into the hole, carefully connect the drain assembly to your plumbing system. Confirm all connections are tight to prevent leaks. Check that water seals are properly installed to maintain a watertight barrier, which is crucial for effective drain function and drain maintenance. Proper sealing also prevents sewer gases from entering your sauna. Use a level to verify the drain is flush with the floor, ensuring smooth water flow. Tighten fittings gradually to avoid cracking or damaging components. Regularly inspect and clean the drain to maintain peak performance. Proper connection and sealing reduce the risk of future clogs or leaks, making your sauna safer and easier to maintain. Remember, a secure, sealed connection is key for long-term durability.
Seal the Drain and Ensure Proper Water Flow
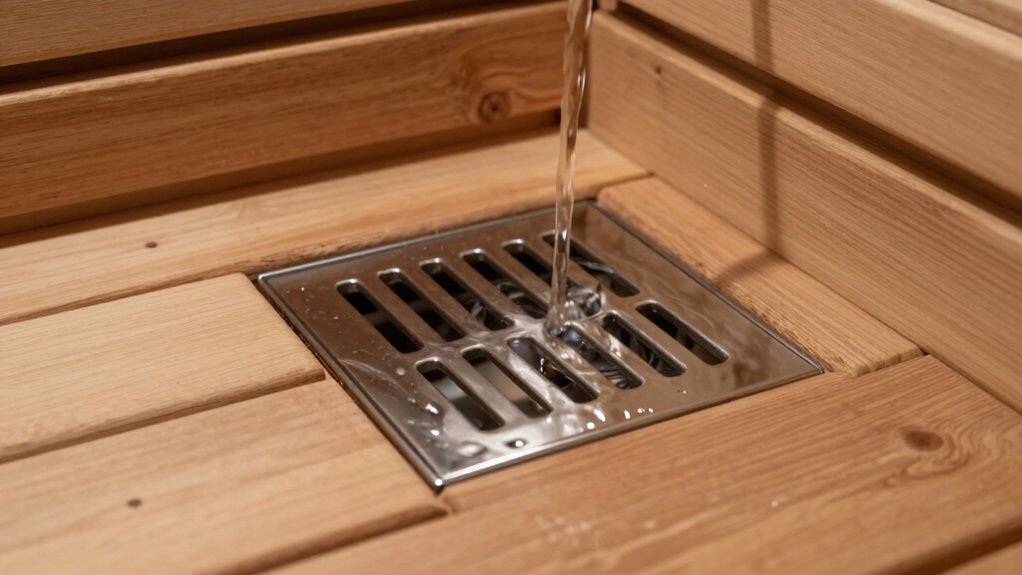
To guarantee your sauna drains properly and prevent leaks, you need to seal the drain securely. Start with a thorough sealant application around the edges of the drain to create a watertight barrier. Use a high-quality, waterproof sealant suitable for sauna environments, and ensure you apply it evenly to fill all gaps and seams. Once sealed, test water flow by pouring a small amount of water around the drain to check for leaks or pooling. Proper water flow optimization is vital; make sure the drain is slightly angled to direct water efficiently toward the pipe. Confirm that no blockages or obstructions hinder drainage. Securing a tight seal and verifying water flow will keep your sauna dry and functioning smoothly.
Troubleshoot Installation and Drainage Problems
If you notice persistent drainage issues or leaks in your sauna, it’s essential to troubleshoot the installation carefully. First, check the drain pipe for clogs or misalignments that could impede water flow. Confirm the drain pipe slopes properly toward the exit point, avoiding dips that trap water. Also, inspect your ventilation system; inadequate airflow can cause moisture buildup, leading to drainage problems. Proper ventilation helps prevent mold and reduces water stagnation.
- Verify the drain pipe connection for secure sealing and correct positioning
- Clear any blockages or debris within the drain pipe and surrounding area
- Assess the ventilation system to ensure it facilitates proper moisture escape
Frequently Asked Questions
Can I Install a Floor Drain in a Curved or Uneven Sauna Floor?
Yes, you can install a floor drain in a curved or uneven sauna floor. You’ll need to customize the drain’s collar or use flexible fittings to accommodate curved floors and uneven surfaces. Make certain the drain is sloped properly to direct water efficiently. It might require extra sealing or a flexible sealant to prevent leaks. With proper adjustments, a floor drain can be effectively integrated into your sauna even with curved or uneven floors.
What Safety Precautions Should I Take During Installation?
Safety’s no accident, so take precautions during installation. First, guarantee electrical safety by turning off power and avoiding water contact with wiring. Use proper drainage tools to prevent leaks, and double-check connections for tight seals. Wear gloves and eye protection to avoid injuries. Keep your workspace dry and organized. Remember, rushing can lead to mistakes—stay focused and follow safety guidelines to keep your sauna safe and functional.
How Do I Prevent Mold and Mildew Around the New Drain?
To prevent mold and mildew around your new drain, improve ventilation to reduce humidity and moisture buildup. Install proper ventilation improvements like exhaust fans or vents. Adding a moisture barrier around the drain area helps prevent water from seeping into walls or floors, reducing mold growth. Regularly clean and inspect the area for any signs of moisture or mold, and guarantee the sauna stays dry after use to keep mold at bay.
Will Adding a Drain Affect My Sauna’s Insulation?
Adding a drain is like opening a window to fresh air—careful, and with purpose. The drain material, whether PVC or metal, won’t considerably impact your sauna’s insulation if installed correctly. Proper sealing prevents thermal bridges, ensuring your warmth stays inside. As long as you avoid damaging insulation layers during installation, the impact remains minimal, allowing your sauna to retain heat and comfort without compromise.
How Often Should I Clean or Inspect the Floor Drain?
You should clean and inspect your floor drain at least once a month to guarantee proper drainage and prevent clogs. Regular drain maintenance keeps water flowing smoothly, reducing potential mold or mildew issues. Establish an inspection schedule to check for debris, buildup, or any signs of damage. Promptly address any problems you find to maintain a safe, functional sauna environment and prolong the life of your drainage system.
Conclusion
Adding a floor drain to your sauna is like giving it a safety net—ready to catch splashes and excess water. With the right spot, tools, and a step-by-step approach, you can upgrade your sauna without a full remodel. Just stay patient and precise, and you’ll create a smoother, safer experience. Think of it as planting a sturdy root—your sauna will thrive with this simple, smart upgrade that keeps everything flowing effortlessly.