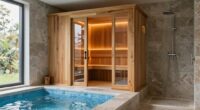
To route sauna wiring cleanly without ugly conduit runs, plan your layout carefully by hiding cables behind wall panels or within ceiling cavities. Use surface-mounted channels or clips along edges and corners for a seamless look, and keep wiring behind trims or molding. Secure everything with proper fasteners, avoiding tight bends or exposed wires. Following safety codes and selecting appropriate concealed conduit options guarantees a neat finish—more tips on achieving a professional, clutter-free installation lie ahead.
Key Takeaways
- Plan wiring routes behind walls or within wall cavities to hide conduits and maintain a clean appearance.
- Use surface channels or low-profile conduit that blends with the wall for discreet wiring paths.
- Conceal wiring along edges, behind panels, or within framing to avoid visible conduit runs.
- Secure wiring with clips and fasteners along studs, keeping cables tight and out of sight.
- Incorporate pre-cut channels or raceways for a seamless, professional look while maintaining accessibility.

Pangda 50ft Split Wire Loom Tubing Flame Retardant Braided Cable Sleeve Split High Temperature Cable Conduit Auto Wire Conduit for Industrial Electrical Tinsel Automotive Marine(50 Ft, 1")
Flame Retardant and Heat Resistant: the braided wire loom is crafted from polypropylene material resistant to high temperatures,…
As an affiliate, we earn on qualifying purchases.
As an affiliate, we earn on qualifying purchases.
Planning Your Sauna Wiring for a Clean Look
To achieve a clean and professional-looking sauna, you need to carefully plan your wiring layout before starting any installation. Start by considering how sauna insulation impacts wiring placement, ensuring cables won’t interfere with insulation layers. Proper ventilation planning is essential to prevent heat buildup around wiring, which can cause damage or safety hazards. Additionally, smart choices in material selection can enhance both safety and aesthetic appeal. A well-designed wiring system can also ensure that regular checkups are easier to conduct without visible interference. Map out a route that minimizes the use of visible conduit runs, keeping cables tucked discreetly behind walls or within framing. Use flexible pathways that follow existing structures, avoiding unnecessary bends or detours. This planning stage helps you identify the best spots for junction boxes and outlets, making future maintenance easier. Thoughtful wiring planning guarantees your sauna remains both safe and visually appealing without cluttered conduit runs. Additionally, exploring digital concepts can provide innovative solutions for modern wiring challenges. Incorporating research-driven insights into your planning phase can further enhance the efficiency and safety of your sauna’s electrical system. Understanding user consent management is also important as it ensures any connected devices respect privacy and data handling standards.

Strong Self Adhesive Wire Clips Cable Zip Tie Mounts 3/4" with 6 Inch Zipties Black UV Protection Outdoor 100 Pcs,Sticky Wire Fasteners Cable Guide Management Mounting Suqare Holder Anchor Base Small
High quality material:Wahsure zip ties made of nylon66 and plastic cable tie mounts back attached strong 3M sponge…
As an affiliate, we earn on qualifying purchases.
As an affiliate, we earn on qualifying purchases.
Choosing the Best Concealed Conduit Options
Certainly! Here’s your updated content with the requested changes:
—
Selecting the right concealed conduit options can make a significant difference in maintaining a clean, professional look in your sauna. You want conduit materials that are durable and resistant to heat, moisture, and corrosion, such as PVC or metal options like EMT or flexible metal conduit. Consider wire insulation as well; it should be rated for high temperatures and moisture exposure to guarantee safety and longevity. Additionally, using commercial kitchen equipment can provide insights into the durability needed for your sauna setup. Smooth, low-profile conduit runs help hide wiring and reduce visual clutter, similar to how easy homemade flautas can elevate a family dinner with minimal fuss. Incorporating growth mindsets in your project planning can also enhance creativity and problem-solving. Use fittings and connectors that match your chosen conduit material for a seamless appearance. Choosing the right combination of conduit materials and appropriate wire insulation ensures your wiring remains protected, neat, and unobtrusive, giving your sauna a polished, professional finish without ugly conduit runs. Moreover, selecting high-quality materials can enhance your investment, similar to how precious metal investments can provide long-term value. Additionally, ensuring that your selections align with best practices for electrical installations can enhance safety and performance.
—
Let me know if you need any further adjustments!

LL2 (078157) 2" PVC Type LL Conduit Body, Schedule 40, Electrical Access Fitting, Gray, Weatherproof, (1 Unit)
HEAVY-DUTY PVC CONSTRUCTION: Durable non-metallic conduit body offers excellent corrosion resistance for reliable indoor and outdoor electrical installations.
As an affiliate, we earn on qualifying purchases.
As an affiliate, we earn on qualifying purchases.
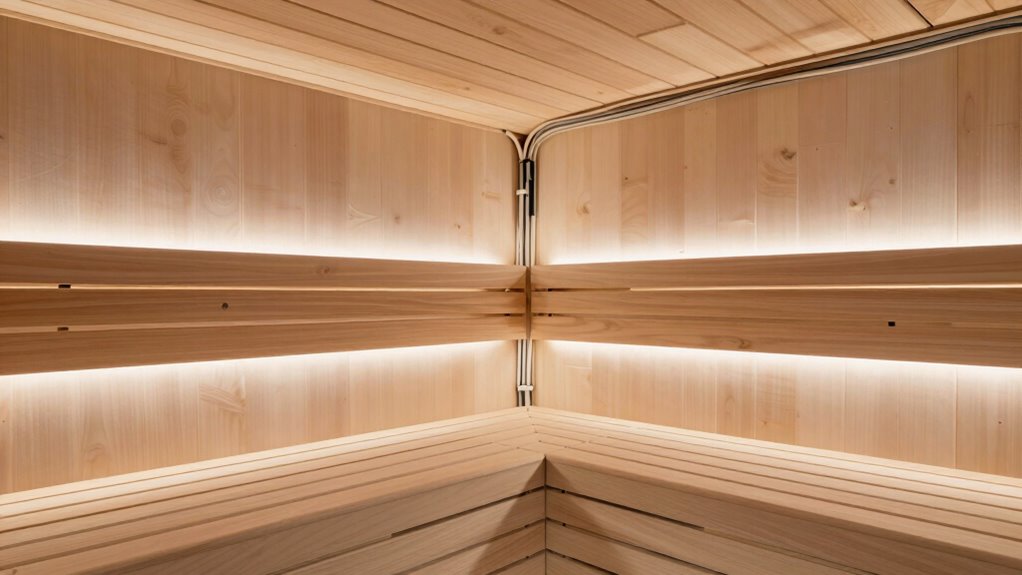
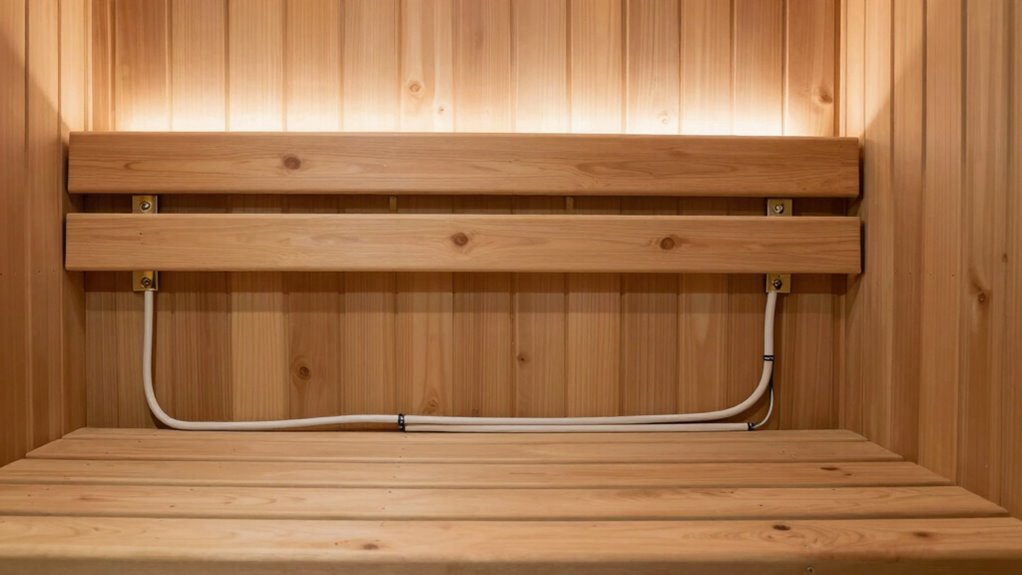
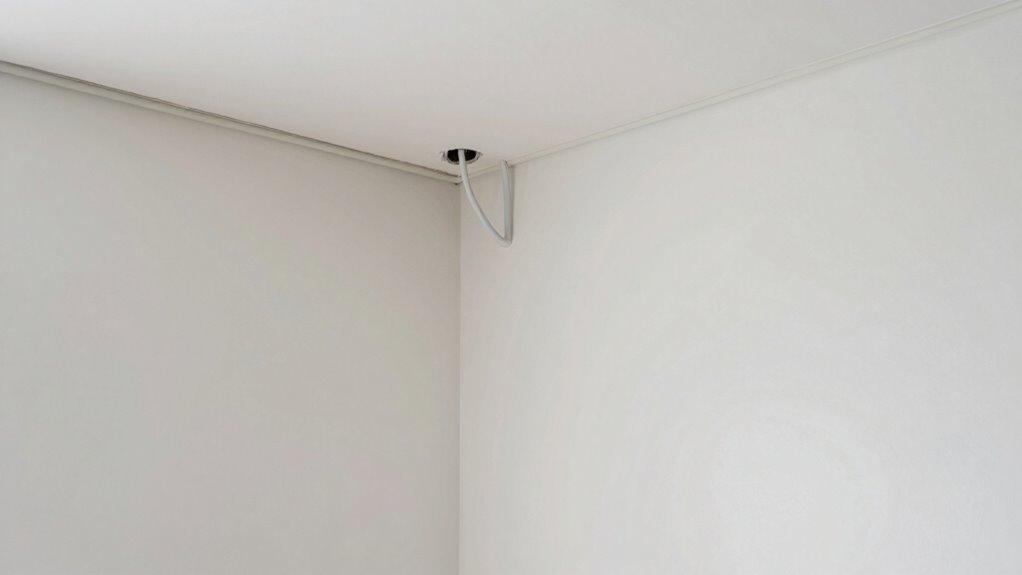
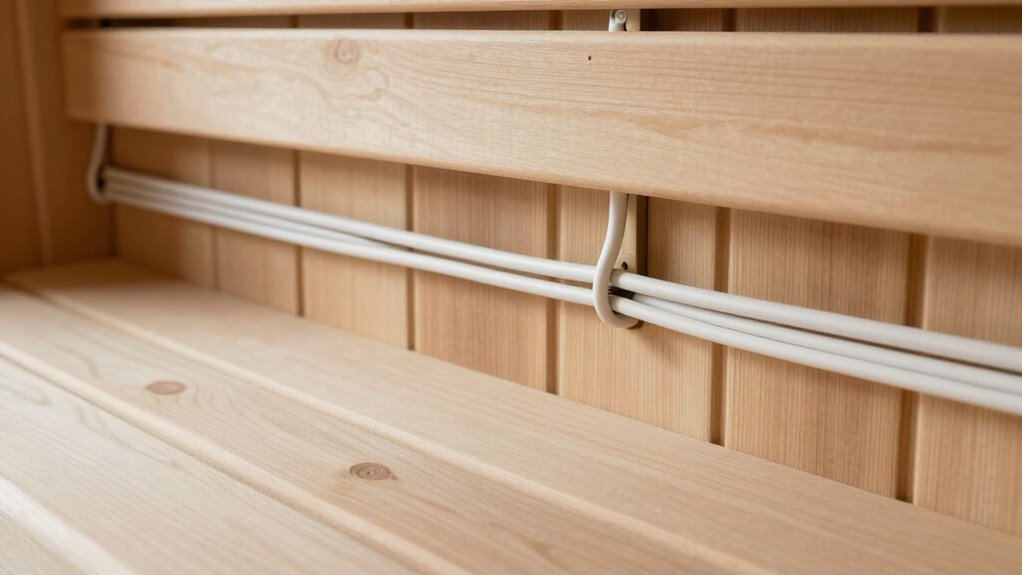
How to Hide Wires Behind Wall Panels and Trims
Hiding wires behind wall panels and trims creates a clean, polished look in your sauna. Start by carefully routing the wiring behind panels, ensuring they stay hidden from view. For lighting fixtures, install wiring through pre-cut channels or within the wall cavity, then secure the fixtures flush against the wall. When it comes to ventilation ducts, hide the wiring along the edges or behind the duct covers to avoid visible cords. Use clips or adhesive-backed cable organizers to keep wires tight and out of sight. Make sure to leave slack for maintenance and future adjustments. Concealing wires behind panels and trims not only improves aesthetics but also reduces tripping hazards and keeps the sauna safe and clutter-free. Additionally, ensuring proper ventilation control is crucial for maintaining a comfortable environment in your sauna, especially as women’s LPGA achievements have shown how a well-designed space can enhance performance. An organized approach to wiring can enhance your overall cycling skills, especially when trying to navigate tight spaces. Incorporating lightweight foundations in your design can also help maintain a fresh and open feeling within the sauna. Consider that using bike generators can also promote sustainability, making your sauna experience even more eco-friendly.
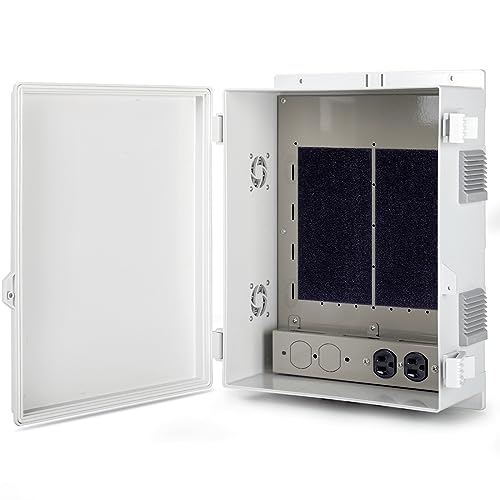
Namunanee Outdoor Electrical Junction Box with High Power Outlet, 16" H* 12" L* 5.9" W, ABS Water Resistant Enclosure with Internal Mounting Panel & Hinged Cover.
【Sturdy and durable】The junction box is made of high-quality ABS material, which has good impact resistance and ensures…
As an affiliate, we earn on qualifying purchases.
As an affiliate, we earn on qualifying purchases.
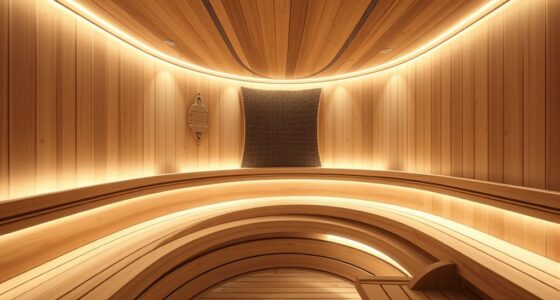
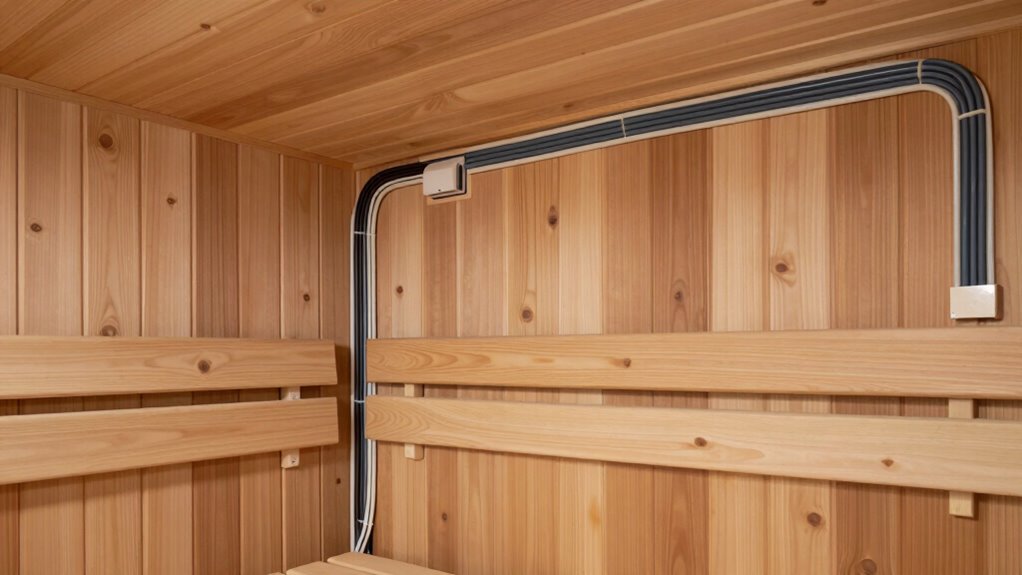
Using Surface-Mounted Channels for a Seamless Finish
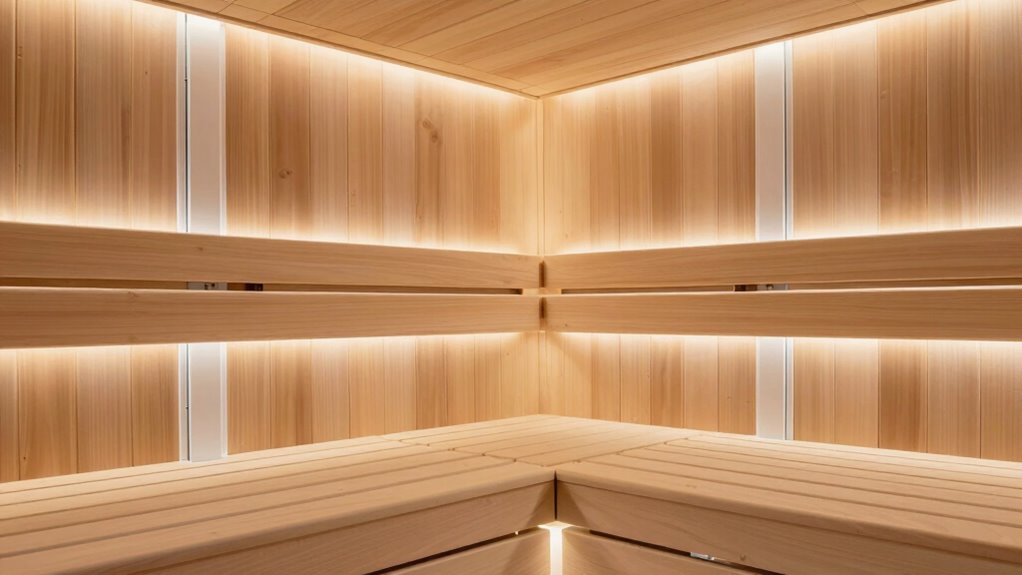
Using surface-mounted channels is an effective way to achieve a clean, professional look for your sauna wiring. These surface channels allow you to conceal cables neatly along walls or ceilings, avoiding unsightly conduit runs. They’re easy to install, flexible for different layouts, and help maintain a sleek appearance. When choosing surface channels, consider their size and color to match your sauna decor. They provide excellent cable concealment while making future adjustments simple. Imagine a tidy finish with cables hidden behind a smooth, unobtrusive surface, instead of cluttered conduit. Additionally, using natural light in your sauna can enhance the overall ambiance and promote relaxation, as proper lighting can significantly affect the mood and comfort levels. Incorporating eco-friendly natural pools can also inspire a serene environment that complements your sauna experience.
- Discreetly follow walls and ceiling contours
- Keep wiring protected from moisture and heat
- Easily add or adjust cables later
- Achieve a seamless, minimalist look
- Minimize visual clutter with clean cable concealment
Incorporating smart furniture solutions can further enhance the overall organization of your sauna space.
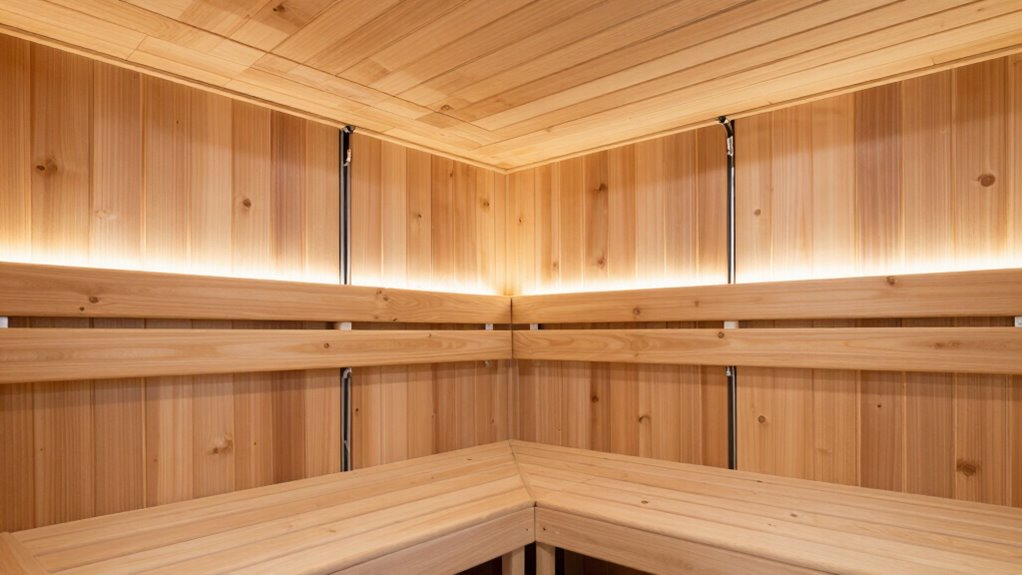
Routing Wiring Along Walls and Corners Safely
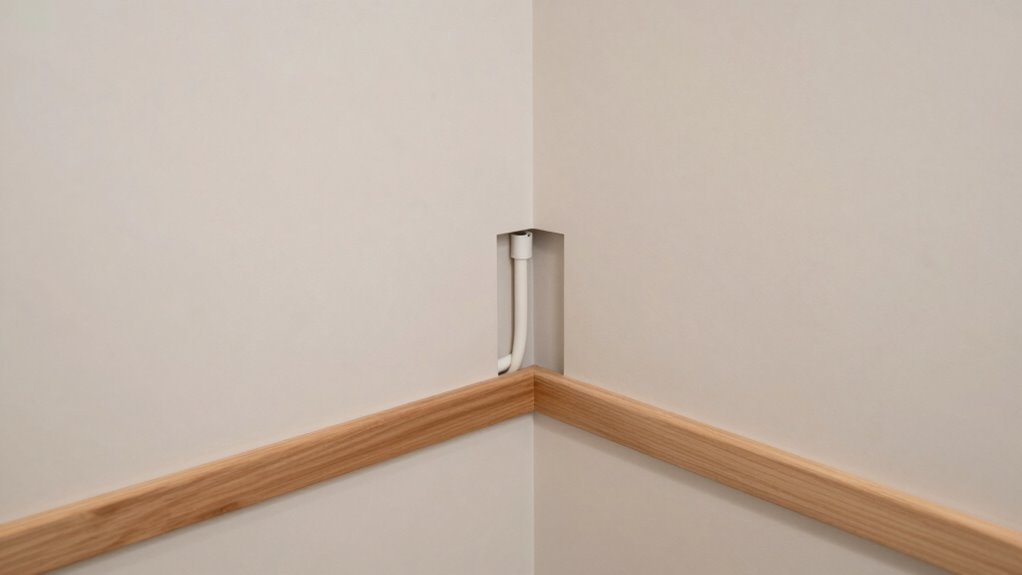
Routing Wiring Along Walls and Corners Safely
Routing wiring along walls and corners requires careful planning to guarantee safety and durability. You want to avoid clutter and assure easy access for maintenance. Position wiring so it doesn’t interfere with lighting placement or ventilation routing. Use proper clips and fasteners to secure cables along wall studs or corners, keeping them neat and away from moisture or heat sources. Additionally, consider comfort and safety products that can help manage and protect wiring from potential damage. It’s also critical to follow electrical code requirements for spacing and protection. Incorporating smart home strategies can further enhance the safety and efficiency of your wiring setup. When planning your layout, be mindful of waterpark safety guidelines that can help prevent accidents and ensure a secure environment. Be mindful of electrical code requirements for spacing and protection. Additionally, consider using car protection accessories that can help manage and protect wiring from potential damage. To visualize, consider this table:
| Area | Key Considerations |
|---|---|
| Wall placement | Keep wiring away from direct contact with water or heat sources |
| Corner routing | Use corner protectors and secure cables tightly |
| Lighting placement | Route wiring where fixtures won’t obstruct or be obstructed |
| Ventilation routing | Avoid crossing wiring paths with ventilation ducts |
Installing In-Wall Wiring That Meets Code
You need to make certain your in-wall wiring complies with local codes to ensure safety and legality. Use the proper wiring methods, such as conduit or approved cables, to meet these standards. Planning your pathways carefully helps you avoid future issues and keeps your installation clean and efficient. Additionally, exploring trusted resources can provide valuable guidance on best practices in electrical installations.
Comply With Local Codes
Before starting your sauna wiring project, it’s essential to confirm your work adheres to local electrical codes. This guarantees safety and legal compliance, especially when installing in-wall wiring. You should check for specific requirements regarding remote control wiring, moisture protection, and conduit use. Local codes may specify approved materials, insulation standards, and installation practices.
- Use only approved wiring types designed for moisture-prone environments
- Install proper moisture barriers around wiring to prevent damage
- Follow guidelines for remote control wiring to ensure reliable operation
- Secure wiring neatly within approved conduit or channels
- Obtain necessary permits and inspections before finalizing your work
Adhering to these codes helps avoid safety hazards and code violations, ensuring your sauna remains safe and functional long-term. Always double-check local requirements before starting any wiring project.
Use Proper Wiring Methods
To guarantee your sauna wiring meets local code requirements, selecting the proper wiring methods is essential. Use wiring with appropriate electrical insulation to prevent heat damage and assure safety. Choose wires rated for high temperatures and moisture, such as underground feeder or direct burial cables, to withstand the sauna environment. Properly sized conductors are critical for circuit breaker selection; guarantee they match the breaker’s amperage to prevent overloads or trips. When installing in walls, secure the wiring with clamps and avoid tight bends, which can damage insulation. Use conduit or protected pathways where necessary, but keep runs neat and hidden. Following these methods guarantees a safe, code-compliant installation that minimizes ugly conduit runs, delivering a clean, professional finish.
Plan Pathways Carefully
Planning your pathways carefully is essential to guarantee your in-wall wiring meets code and looks professional. Proper planning assures safe installation and smooth operation of your sauna’s lighting design and temperature control systems. Visualize how wiring will run behind walls, avoiding sharp bends or crowded spaces. Map out routes that minimize conduit use and prevent interference with other components. Keep in mind the placement of switches, sensors, and control panels to optimize accessibility and function. Consider local codes for wire spacing and protection. By planning ahead, you prevent future troubleshooting headaches and achieve a clean, finished appearance.
- Map lighting zones and control points
- Route wiring away from moisture sources
- Plan pathways that follow wall studs or framing
- Ensure enough slack for adjustments
- Avoid crossing or tangling with other electrical runs
Safety Tips for Neat and Secure Sauna Wiring
To guarantee your sauna wiring is both safe and tidy, you need to follow proper grounding practices, use the correct wire gauges, and secure all wiring effectively. These steps help prevent electrical hazards and keep your wiring neat. Paying attention to these safety tips will make your installation reliable and compliant.
Proper Grounding Practices
Ensuring proper grounding is essential for safety and reliability in your sauna wiring. Good grounding techniques prevent electrical shocks and ensure your system meets electrical code compliance. To achieve this, connect the grounding conductor securely to the main grounding system, avoiding loose connections. Use a grounding bus bar or terminal strip for neatness. Ensure all grounding wires are continuous and free of corrosion. Keep the grounding path as direct as possible, minimizing unnecessary bends or joints. Proper grounding also involves verifying the grounding electrode system, like grounding rods or plates, are correctly installed. Remember, adhering to electrical code standards isn’t just a recommendation—it’s a safety requirement. When done correctly, your sauna wiring remains safe, reliable, and free from potential electrical hazards.
Use of Correct Wire Gauges
Choosing the appropriate wire gauge is vital for a safe and reliable sauna wiring setup. Using the right gauge ensures your wiring can handle the load without overheating, especially when employing heat resistant cables. Proper insulation techniques are indispensable to prevent heat damage and maintain safety. Refer to the table below to select suitable wire gauges based on circuit amperage:
| Amperage | Wire Gauge | Recommended Insulation Type |
|---|---|---|
| 15-20A | 12 AWG | Heat resistant, moisture-resistant |
| 20-30A | 10 AWG | Heat resistant, flexible |
| 30-40A | 8 AWG | Heavy-duty, heat resistant |
| 40+A | 6 AWG | High-capacity, durable |
Choosing the correct gauge and insulation techniques keeps your sauna wiring neat, safe, and efficient.
Securing Wiring Properly
Properly securing your sauna wiring is essential for safety and a tidy appearance. You want to prevent loose wires that could cause shorts or damage. Use sturdy cable clamps or clips to fasten wiring along walls and ceiling surfaces. Keep lighting fixtures and ventilation ducts clear by securing wires neatly around them, avoiding sagging or tangling. Proper securing also minimizes vibration and movement, reducing wear. When attaching wiring, guarantee it’s snug but not overly tight to prevent damage. Use appropriate fasteners for the environment, especially in humid areas. Pay attention to secure connections near lighting fixtures and ventilation ducts, avoiding exposed wires. This approach ensures your sauna wiring remains safe, organized, and visually clean.
Troubleshooting Common Wiring Challenges in Saunas
When wiring a sauna, common challenges often stem from loose connections, incorrect wire sizes, or faulty grounding. These issues can lead to safety hazards or inconsistent performance. To troubleshoot effectively, first check that all connections are tight and secure. Confirm you’re using the correct wire size for your sauna’s amperage, as undersized wires can overheat. Verify that moisture barriers and sauna insulation are properly installed, preventing moisture from compromising electrical components. Moisture buildup can cause corrosion or shorts, so inspect these barriers regularly. Also, make sure grounding is solid and compliant with electrical codes. Properly installed sauna insulation and moisture barriers protect wiring from humidity, reducing troubleshooting headaches and ensuring a safe, reliable setup.
Frequently Asked Questions
Can I Run Sauna Wiring Outdoors or in Damp Locations?
Yes, you can run sauna wiring outdoors or in damp locations, but you need proper outdoor insulation and moisture barriers. Use weatherproof, outdoor-rated wiring and conduit designed for moisture exposure. Install moisture barriers to prevent water penetration and protect the wiring from humidity. Proper sealing and insulation guarantee safety, durability, and compliance with electrical codes, keeping your sauna wiring safe and functional in challenging environments.
What Tools Are Essential for Installing Hidden Wiring in a Sauna?
To hide sauna wiring effectively, you’ll need a wire stripper, a drill, and fish tape for easy concealment. Use insulation techniques like conduit or raceways to keep cables protected and neat. A level ensures straight runs, while a junction box keeps connections tidy. These tools help you accomplish wire concealment, making your sauna wiring look clean and professional, with no ugly conduit runs disrupting the sleek design.
How Do I Prevent Thermal Expansion From Damaging Concealed Wiring?
To prevent thermal expansion from damaging concealed wiring, you should allow for thermal movement by choosing wiring with adequate flexibility. Use flexible conduit or slack loops that can absorb expansion and contraction caused by the sauna’s temperature changes. Avoid tight bends or rigid connections, and secure wiring loosely to give it room to move. This approach minimizes stress on the wiring, reducing the risk of damage and ensuring safe, long-lasting installation.
Are There Specific Wiring Colors or Types Recommended for Saunas?
For sauna wiring, stick to standard color coding and wiring standards to guarantee safety and easy identification. Typically, black or red wires are hot, white is neutral, and green or bare copper is ground. Use high-temperature rated cables like THHN or SOOW, designed for sauna environments. Following these color coding and wiring standards helps prevent mistakes, simplifies troubleshooting, and guarantees your sauna wiring is safe, compliant, and neatly organized.
How Often Should I Inspect Hidden Wiring for Safety and Maintenance?
Did you know that hidden wiring issues account for about 15% of electrical fires? You should inspect hidden wiring in your sauna at least once a year to guarantee safety and proper maintenance. Regular safety inspections help catch potential problems early, preventing hazards. Pay close attention to connections, insulation, and signs of wear. Staying proactive keeps your sauna safe and extends its life, giving you peace of mind during relaxing sessions.
Conclusion
By planning carefully and choosing the right concealment methods, you can route your sauna wiring neatly without ugly conduit runs. Remember, a clean wiring setup not only looks better but also enhances safety and accessibility. Did you know that properly installed in-wall wiring reduces fire risk by up to 60%? Taking the time to hide your wires properly guarantees your sauna remains both beautiful and safe for years to come.