To insulate your sauna without trapping moisture, choose moisture-resistant materials like foil-faced foam boards or mineral wool. Install a proper vapor barrier inward, sealing all seams tightly to prevent leaks. Guarantee good ventilation by placing intake and exhaust vents properly, and consider using an exhaust fan to remove humid air after use. Maintaining balanced humidity levels and checking insulation regularly helps keep your sauna dry and durable—keep exploring for detailed tips on perfecting your setup.
Key Takeaways
- Use breathable insulation materials like mineral wool or foil-faced foam boards to allow moisture vapor to escape.
- Install a proper vapor barrier facing inward, sealed tightly with overlaps and tape to prevent moisture infiltration.
- Ensure adequate ventilation with vents and exhaust fans to facilitate continuous moisture removal.
- Avoid compressing insulation and maintain proper thickness to prevent moisture trapping and ensure thermal performance.
- Regularly inspect and maintain ventilation systems and insulation to detect and address moisture issues early.
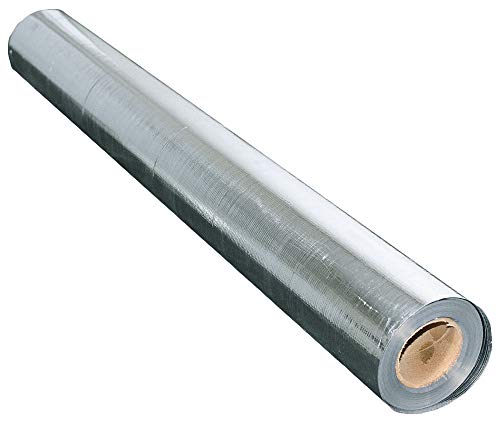
US Energy Products 250 sqft (4ft x 62.5ft) Aluminum Foil Barrier Insulation Sauna Non Perforated Solid 8 Mil Reinforced Aluminum Vapor Barrier.
As an affiliate, we earn on qualifying purchases.
As an affiliate, we earn on qualifying purchases.
Why Moisture Control Is Critical in Sauna Insulation
Moisture control is essential when insulating a sauna because excess humidity can lead to mold, rot, and deterioration of the insulation materials. When insulation absorbs moisture, its effectiveness drops, and it becomes a breeding ground for mold and bacteria. This moisture absorption reduces insulation durability, meaning you’ll need to replace it sooner than expected. Proper moisture management ensures the insulation maintains its insulating properties over time, protecting the sauna’s structure. Without regulating moisture, the insulation may become damp, which weakens its ability to resist temperature changes and increases energy costs. By focusing on moisture control, you help prolong the lifespan of your insulation, keep your sauna safe and healthy, and avoid costly repairs caused by moisture-related damage. Additionally, understanding the impact of microplastics in dust can further enhance your strategy for maintaining a clean and safe sauna environment. Moreover, choosing materials with high thermal resistance can significantly improve insulation efficiency while minimizing moisture issues. Incorporating natural filtration systems can also aid in managing humidity levels effectively, as effective air filtration systems can help reduce excess moisture in the air. Furthermore, utilizing soundproofing techniques can enhance the overall sauna experience by minimizing external noise interference.

TapePlus Aluminum Foil Tape – HVAC & Ductwork Sealing with HVAC Tape – Metal Ductwork Insulation & Moisture Protection – Heat-Resistant Performance to 250°F – 2 in x 70 yd, Pack of 1, Silver
TapePlus Excellence: Discover TapePlus Aluminum Tape, a premium choice for HVAC professionals and home improvement enthusiasts. This aluminum…
As an affiliate, we earn on qualifying purchases.
As an affiliate, we earn on qualifying purchases.
Choosing Moisture-Resistant Insulation Materials

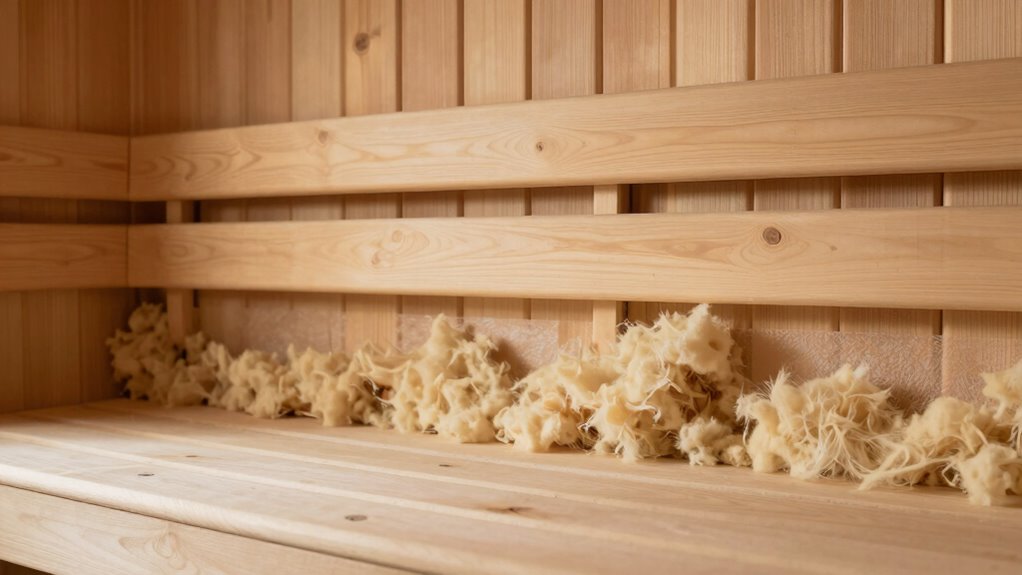
When selecting insulation for your sauna, opting for moisture-resistant materials is essential to prevent mold and deterioration. Focus on choosing insulation with the right thickness to guarantee adequate thermal performance without excess bulk that could trap moisture. Materials like foil-faced foam boards, mineral wool, and closed-cell spray foam offer high durability and resist water vapor buildup. Their material durability ensures they won’t break down or lose insulating properties over time, even in humid conditions. Avoid porous or fibrous insulations that absorb moisture, as they can lead to mold growth. By selecting moisture-resistant insulation with appropriate thickness and durable properties, you create a long-lasting, effective barrier that keeps your sauna warm and dry.

ACEDUROBLA 4 inch Exhaust Fan Metal Iron Ventilation Extractor, Silence with Anti-backflow Check Valve Window and Wall Mount Vent Fans for Home Office Kitchen Bathroom Grow Tent Garage
【Metal Ventilation Fan】>> Made With Metal Material, That'S Heavy Duty And Can'T Be Broken Easily Compared To Plastic…
As an affiliate, we earn on qualifying purchases.
As an affiliate, we earn on qualifying purchases.
Ventilation Strategies to Keep Your Sauna Dry
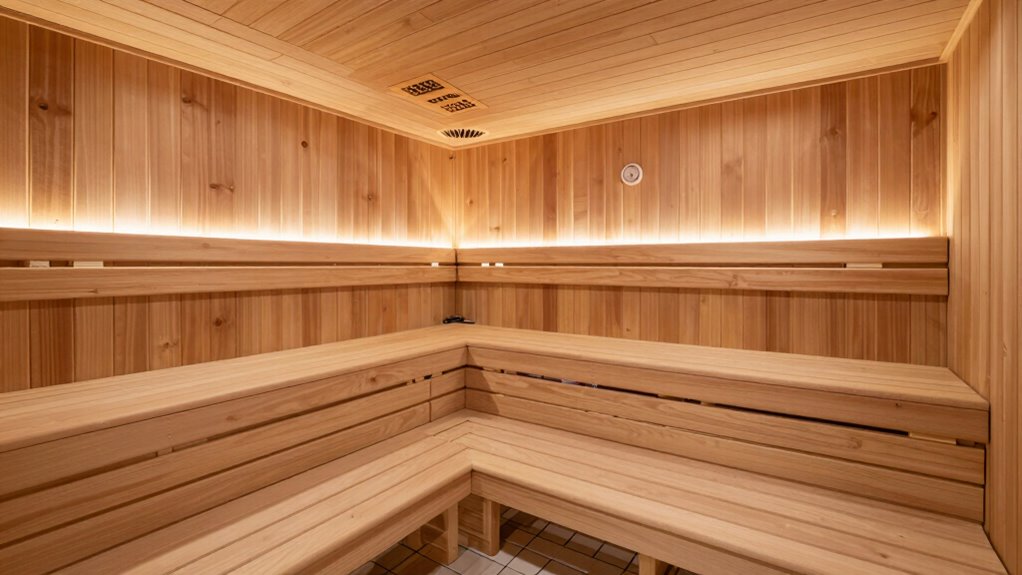
Proper vent placement guarantees moisture escapes efficiently, preventing buildup inside your sauna. Installing exhaust fans helps remove humid air quickly, especially after use. Regularly circulating air keeps the space dry and reduces the risk of mold and damage. Incorporating brewing science principles can further enhance your understanding of moisture control in enclosed spaces. Additionally, understanding energy-efficient heating methods can improve your sauna’s overall performance and comfort. Implementing whole-home water systems can also contribute to better humidity control, as they optimize water usage and reduce excess moisture generation. Furthermore, embracing Victorian etiquette can elevate your sauna experience by promoting respectful interactions among users. Proper user consent management is crucial for ensuring that any devices used for ventilation respect privacy and data preferences.
Proper Vent Placement
Effective vent placement is essential for maintaining a dry and comfortable sauna environment. Properly positioned vents ensure good airflow, preventing moisture buildup and reducing the risk of mold. For maximum thermal insulation, place vents near the ceiling to allow hot, moist air to escape efficiently. This also enhances acoustic insulation by reducing sound reverberation inside the sauna. Additionally, the right door swing can further improve airflow dynamics by ensuring that the sauna door opens without obstructing vent placements. Position intake vents lower on the walls to draw in fresh, cooler air, promoting circulation. Furthermore, consider using high-speed connectivity to monitor humidity levels remotely and make adjustments as needed. Incorporating heat buffering techniques can also help maintain consistent temperatures and prevent overheating. It’s also important to recognize that early detection of breast cancer can be crucial, underscoring the importance of a calm and restorative sauna experience. Avoid blocking vents with insulation or furnishings, as this hampers airflow. By strategically placing vents, you help regulate humidity levels, keep the sauna dry, and improve overall comfort. Good ventilation coupled with thoughtful vent placement creates an environment that’s both warm and moisture-free. Moreover, caregiver emotional health can be supported by creating a serene and inviting atmosphere, making the sauna a place for relaxation and reflection.
Use of Exhaust Fans
Exhaust fans play a vital role in maintaining a dry sauna environment by actively removing moist air. Installing fans with humidity sensors guarantees they turn on automatically when humidity levels rise, preventing excess moisture buildup. These sensors help you avoid over-ventilating, keeping the air balanced. Incorporating dehumidification systems further enhances moisture control by extracting humidity from the air, especially during off-hours or when the sauna isn’t in use. Proper placement of exhaust fans at strategic points, such as near the ceiling or vents, maximizes airflow and prevents stagnant, damp air. Regularly monitoring humidity levels with sensors allows you to adjust ventilation effectively, assuring your sauna stays dry and comfortable without trapping moisture inside. Additionally, understanding Leave No Trace principles can inspire the importance of maintaining a well-regulated environment, as it reflects the dedication to excellence found in the sport. Maintaining humidity levels between 40-60% humidity is crucial for optimal indoor plant health, which can also be applied to sauna care. This balance not only fosters mental well-being but also contributes to a more enjoyable sauna experience. Using quality materials, such as durable woods, can also enhance the sauna’s resistance to moisture damage.
Regular Air Circulation
Sure! Here’s the revised article subheading content with your requested changes:
—
Have you considered how regular air circulation can keep your sauna dry? Proper ventilation prevents moisture buildup, protecting your interior decor and lighting solutions. Good airflow helps evaporate excess moisture, reducing mold risk and maintaining a healthy environment. Additionally, being aware of heatstroke signs can help ensure a safe sauna experience. To optimize circulation, install vents or small exhaust fans, and keep doors slightly open after use. Here’s a quick guide:
| Vent Type | Placement | Benefits |
|---|---|---|
| Ceiling vent | Near the stove or heater | Enhances air flow |
| Floor vent | Opposite the ceiling vent | Removes stagnant air |
| Exhaust fan | Near the entrance | Quick moisture removal |
| Intake vent | Lower wall, opposite exhaust | Fresh air intake |
| Window vent | Optional, for sunlight | Improves interior decor |
Effective ventilation keeps your sauna dry, preserving your interior decor and lighting solutions. Additionally, implementing home safety tips can further enhance the overall well-being of your sauna environment. Remember, moisture control is essential for maintaining both comfort and safety in your sauna space. Proper rug cleaning can also play a role in understanding how humidity affects your body, including your nails.
—
Feel free to let me know if you need further modifications!

3 pk 12"x12"x2" Rockwool ProRox Mineral Wool, Replaces Owens Corning Thermafiber, BMW211-3PK-NA
6lb/ft^3 Rockwool ProRox SL960 Mineral Wool – 3 sheets of strong, rigid stone wool insulation
As an affiliate, we earn on qualifying purchases.
As an affiliate, we earn on qualifying purchases.
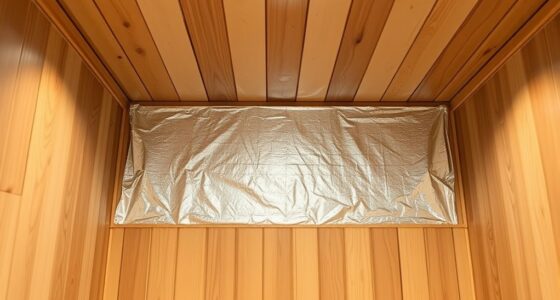
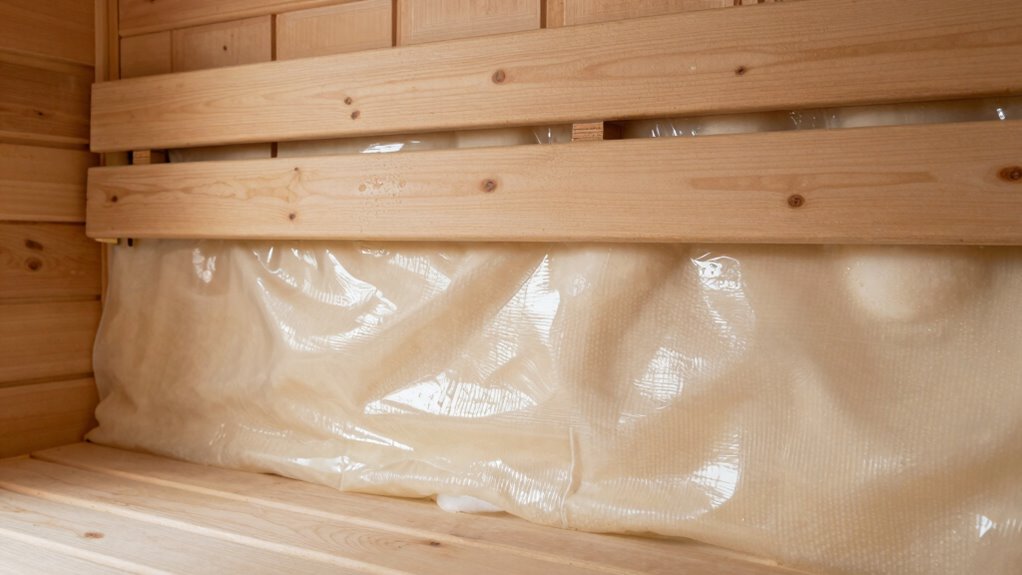
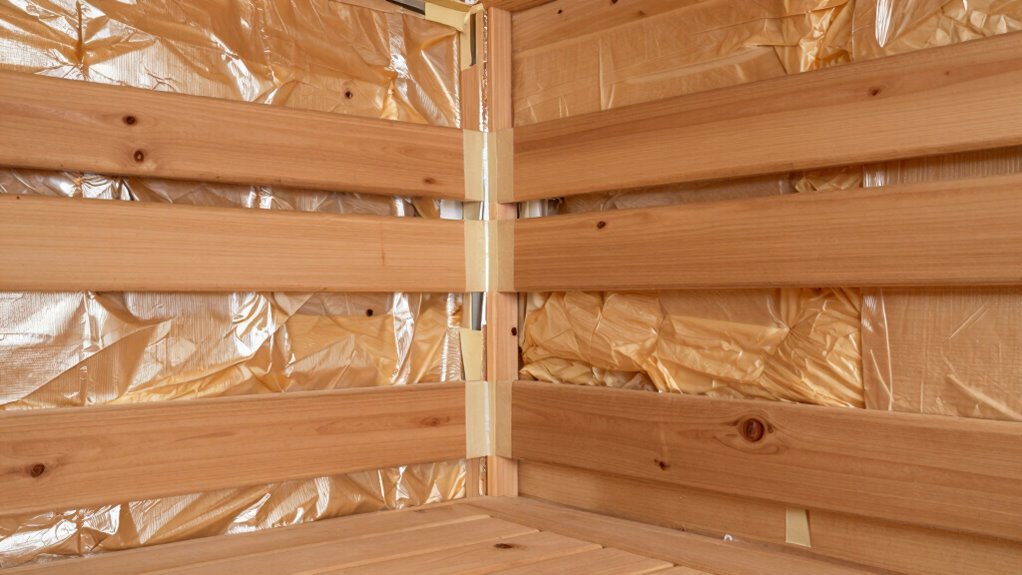
Installing Vapor Barriers to Block Moisture

Choosing the right vapor barrier is essential to prevent moisture from seeping into your insulation. You need to install it correctly, ensuring all seams are sealed tightly and overlaps are proper. Watch out for common mistakes like using the wrong materials or leaving gaps, which can trap moisture instead of blocking it.
Choosing Appropriate Vapor Barriers
Selecting the right vapor barrier is essential to prevent moisture from penetrating your sauna walls and causing damage. You want a barrier with high material durability to withstand the humid environment without tearing or degrading over time. Look for vapor barriers made from polyethylene or foil-faced materials, which effectively block moisture. Aesthetic considerations matter too; choose a barrier that’s discreet or blends with your sauna’s interior if visible. Properly selected barriers not only protect your structure but also maintain the sauna’s appearance. Confirm the material is rated for high moisture environments and compatible with your insulation and wall materials. This careful choice helps create a long-lasting, moisture-resistant barrier that supports a safe, comfortable sauna experience.
Proper Installation Techniques
Proper installation of vapor barriers is essential to effectively prevent moisture from penetrating your sauna walls. To guarantee insulation durability, carefully seal all seams and edges with appropriate vapor barrier tape, avoiding gaps that could trap moisture. Install the barrier with the vapor-proof side facing inward to block humidity from reaching the insulation. Pay attention to aesthetic considerations by aligning the barrier neatly and avoiding wrinkles or overlaps that may be visible later. Use a continuous, taut layer to maintain effectiveness and prevent moisture infiltration. Proper fastening techniques, such as using staples or fasteners, help keep the barrier secure. By following these installation techniques, you create a reliable moisture barrier that preserves your sauna’s insulation quality and maintains a clean, professional appearance.
Common Mistakes to Avoid
Even when installing vapor barriers correctly, common mistakes can undermine their effectiveness and lead to moisture problems in your sauna. One mistake is choosing the wrong material, which can cause incompatibility with insulation or other components. Avoid installing vapor barriers with insufficient insulation thickness, as it won’t provide proper moisture control. Additionally, improper sealing or overlaps can allow moisture to seep through, defeating the barrier’s purpose.
To prevent issues, keep these points in mind:
- Use vapor barriers compatible with your insulation material
- Make certain the insulation thickness meets recommended standards
- Seal all seams and edges tightly
- Avoid puncturing or tearing the barrier during installation
Proper Techniques for Sauna Insulation Installation
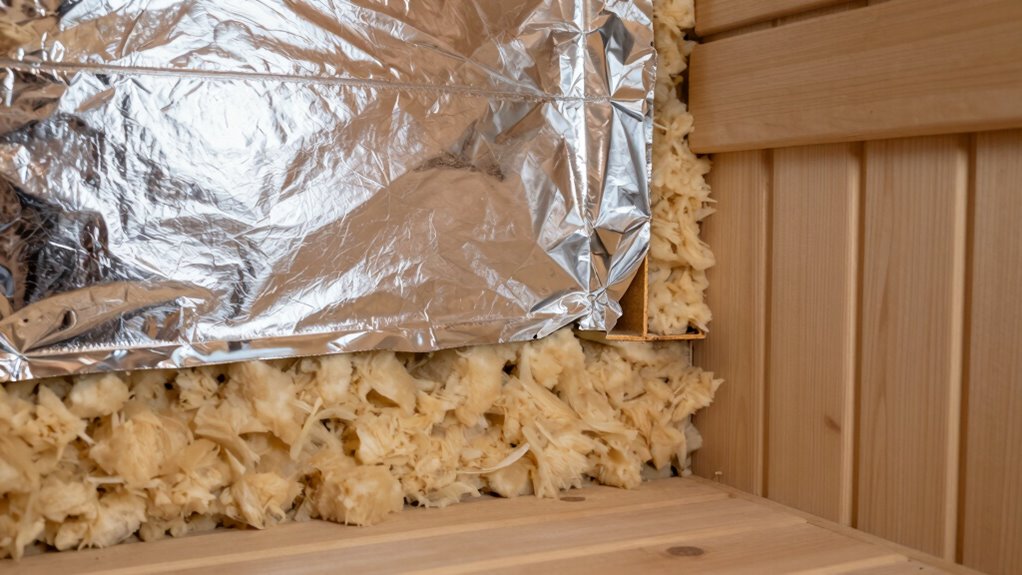
When installing insulation in your sauna, it’s essential to follow proper techniques to prevent moisture buildup and guarantee safety. First, choose insulation with the right insulation thickness for your sauna’s climate and design. Typically, 3.5 to 6 inches provides effective thermal protection. Pay close attention to material density; higher-density insulation reduces air gaps and improves moisture resistance. Always install the insulation with a vapor barrier facing inward, toward the heated space, to block moisture from penetrating walls. Confirm the insulation fits snugly without compression, which can reduce effectiveness. Seal all seams properly with foil tape or appropriate sealant to prevent air and moisture leaks. Proper installation minimizes moisture entrapment, enhances safety, and maintains your sauna’s efficiency over time.
Signs Your Sauna Insulation Is Trapping Moisture

If your sauna insulation is trapping moisture, you’ll likely notice certain warning signs that indicate a problem. Moisture buildup can compromise sauna aesthetics and reduce user comfort. Look for these signs:
- Visible mold or mildew on walls or ceiling
- Unpleasant odors lingering after use
- Damp or sticky surfaces around insulation areas
- Uneven heat distribution or cooler spots in the sauna
These clues suggest trapped moisture may be affecting the environment, leading to potential damage and discomfort. When insulation traps moisture, it can cause materials to degrade, create mold, and diminish overall sauna aesthetics. Recognizing these signs early helps you maintain a healthy, comfortable space and prevents long-term issues.
Long-Term Maintenance for Moisture Management

Maintaining proper moisture control over the long term requires consistent care and proactive strategies. Regularly inspect your sauna’s insulation and vapor barriers to guarantee they remain intact and effective. Proper moisture management helps sustain thermal efficiency, keeping your sauna warm and energy-efficient. It also prevents mold growth and structural issues that can arise from trapped moisture. Pay attention to aesthetic considerations, such as keeping surfaces clean and free of mold or mildew, which maintain the sauna’s inviting appearance. Ventilation plays a key role; ensure it remains unobstructed to allow moisture to escape naturally. By addressing these aspects periodically, you can prolong the lifespan of your sauna, maximize thermal efficiency, and preserve its visual appeal, all while preventing moisture-related damage over time.
Expert Tips for Balancing Heat and Dryness in Your Sauna
Achieving the right balance between heat and dryness in your sauna requires attention to both temperature control and humidity levels. To optimize comfort and insulation aesthetics, focus on proper ventilation and moisture regulation. Use a hygrometer to monitor humidity and adjust heat sources accordingly. Incorporate sauna decor elements that support airflow, like vent openings or moisture-resistant materials. Here are expert tips:
Achieve optimal sauna comfort with proper ventilation, humidity control, and moisture-resistant decor.
- Install adjustable vents to control moisture escape
- Use insulation materials that resist mold and mildew
- Keep the sauna well-ventilated after sessions
- Choose light-colored, moisture-resistant decor to reflect heat
Balancing heat and dryness enhances your sauna experience and preserves its aesthetic appeal. Proper insulation and thoughtful decor contribute to maintaining a comfortable, dry environment without sacrificing warmth.
Common Mistakes to Avoid in Sauna Insulation
One of the most common mistakes in sauna insulation is sealing it too tightly without proper ventilation, which can trap moisture and lead to mold growth. Using insulation materials with high thermal resistance is vital, but over-airtight sealing blocks airflow, causing moisture buildup. To avoid this, make sure your insulation setup allows for adequate ventilation while maintaining heat. Consider the table below for key points:
| Mistake | Consequence |
|---|---|
| Using non-breathable insulation | Traps moisture, promotes mold and decay |
| Over-sealing without vents | Prevents moisture escape, causes damage |
| Ignoring insulation thickness | Reduces thermal resistance, lowers efficiency |
Choosing the right materials and balancing airtightness with ventilation are essential for effective sauna insulation.
Frequently Asked Questions
Can I Use Traditional Home Insulation in My Sauna?
You shouldn’t use traditional home insulation in your sauna because it can cause moisture issues. Traditional insulation isn’t designed to withstand high heat and moisture, leading to mold, rot, or damage. Instead, opt for sauna-specific insulation materials like mineral wool or foil-backed insulation, which resist moisture and heat better. This guarantees your sauna remains safe, dry, and comfortable without trapping moisture or risking damage.
How Often Should I Inspect Sauna Insulation for Moisture Issues?
You should inspect your sauna insulation every three to six months, like checking a delicate sculpture’s cracks before they spread. During these inspections, focus on moisture detection, ensuring no dampness or mold is hiding behind the walls. Regular checks help preserve insulation longevity, preventing moisture from trapping inside. By catching issues early, you keep your sauna dry, safe, and cozy, prolonging its warmth and comfort for years to come.
Are There Eco-Friendly Insulation Options Suitable for Saunas?
Yes, there are eco-friendly insulation options suitable for saunas. You can use sustainable materials like sheep’s wool, cork, or recycled denim insulation, which are naturally resistant to moisture and mold. These eco-friendly materials not only insulate well but also reduce environmental impact. When choosing sustainable options, verify they are properly installed to prevent moisture buildup, helping you maintain a healthy, energy-efficient sauna environment.
What Is the Ideal Insulation Thickness for Sauna Walls?
You should aim for about 1 to 2 inches of insulation thickness for sauna walls, depending on your climate and preferences. Use suitable insulation materials like mineral wool or foam boards, which resist moisture. Pair them with a proper moisture barrier, such as vapor retarders or foil-faced barriers, to prevent moisture trapping. This combination keeps your sauna warm, energy-efficient, and free from moisture-related damage.
Does Insulation Affect the Sauna’s Heating Efficiency?
Insulation actually boosts your sauna’s heating efficiency—who knew? While some worry about moisture barriers hindering warmth, proper insulation and durable moisture barriers work together to prevent moisture buildup and keep heat sealed in. This balance ensures your sauna stays warm longer, with less energy use. So, yes, insulation certainly affects heating efficiency positively, as long as you choose the right materials that withstand moisture and maintain durability.
Conclusion
By following these tips, you’ll master the art of insulating your sauna without letting moisture turn it into a swamp. Think of your sauna as a fortress of warmth, where proper insulation and ventilation keep moisture at bay like an impenetrable shield. Stay vigilant for signs of trapped moisture and maintain your setup diligently. With these strategies, you’ll enjoy a pristine, dry sauna that’s as cozy and inviting as a mountain cabin — rain or shine!