
When designing your sauna-changing room, prioritize creating designated zones for easy access and comfort. Place lockers or storage units near the entrance, add hooks and shelves for drying clothes, and position seating for relaxing and changing. Incorporate well-lit mirrors and adjustable lighting to set the right mood. Guarantee proper ventilation and moisture-resistant materials to keep the space fresh and inviting. Keep exploring to discover how these ideas come together seamlessly.
Key Takeaways
- Allocate designated zones for lockers, drying areas, and seating to maximize space efficiency and ease of movement.
- Position lockers and storage units near the entrance for quick access and organized storage.
- Incorporate hooks, shelves, and wall-mounted racks for hanging towels, robes, and accessories.
- Ensure ample lighting and mirrors at suitable heights to facilitate dressing and grooming activities.
- Use moisture-resistant materials and proper ventilation to maintain a clean, mold-free environment.

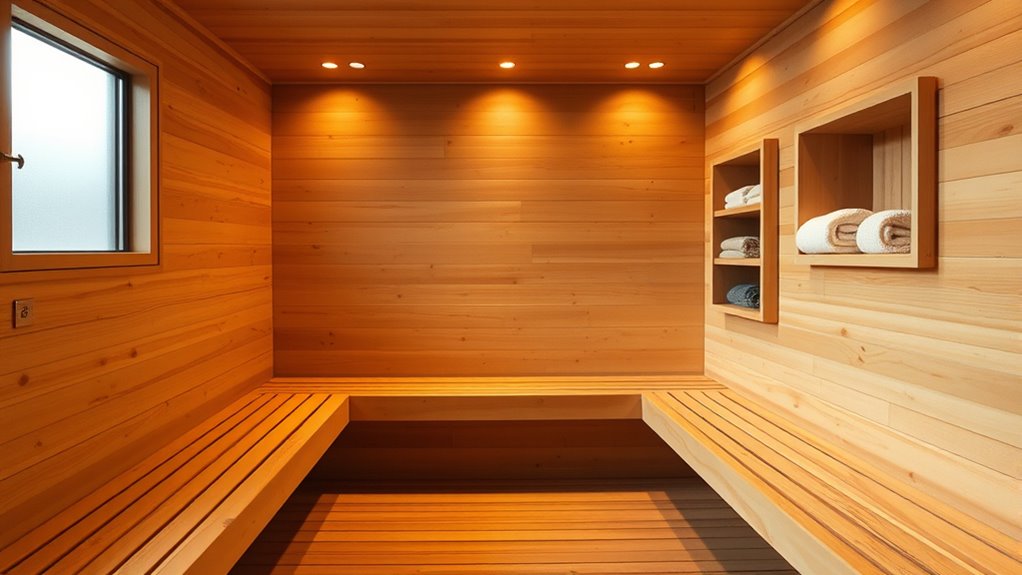
Designing a sauna-changing room requires careful consideration of both comfort and functionality. When you’re planning the layout, focus on creating a space that’s easy to navigate and feels inviting. One of the key elements to consider is lighting fixtures. You want lighting that’s bright enough to see clearly but not so harsh that it disrupts the relaxing atmosphere. Installing warm, soft lighting can enhance the cozy vibe, especially around seating areas and lockers. Dimmable fixtures are a great option, giving you control over the ambiance depending on the time of day or mood you want to set. Avoid overpowering fluorescent lights, which can feel clinical; instead, opt for LED options that provide consistent, energy-efficient illumination.
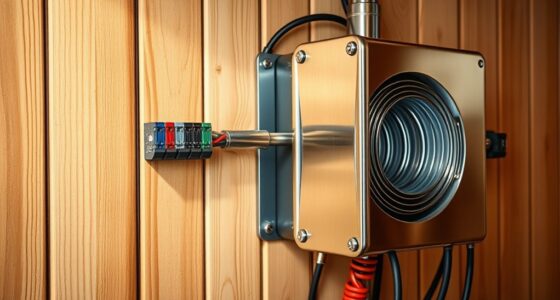
Ventilation systems are equally essential in a sauna-changing room. Proper airflow keeps the air fresh, prevents humidity buildup, and reduces mold or mildew risks. You should guarantee your ventilation system is adequately rated for the size of your space. An exhaust fan placed strategically near the shower or sauna area will quickly remove excess moisture and odors. Consider installing a ventilation grille or vents at high points to facilitate air circulation, especially if the room has limited windows. Good ventilation not only improves air quality but also helps maintain the integrity of your storage solutions and furniture, preventing warping or deterioration caused by excess humidity. Additionally, choosing appropriate ventilation systems**** that match your room’s specifications can significantly improve air quality and overall comfort.
When it comes to the layout, think about creating designated zones that optimize space and ease of use. Position your lockers or storage units near the entrance, so you can quickly stow away towels, robes, and personal items upon entering. Build in enough hooks and shelves for drying clothes or hanging accessories, keeping everything organized and accessible. Seating should be comfortable and strategically placed, allowing you to relax or change clothes without cluttering the pathways. Incorporate mirrors at suitable heights to help with dressing and grooming, making sure they’re well-lit by your selected lighting fixtures.
Additionally, you should plan for seamless integration of your lighting and ventilation systems with the overall design. Conceal wiring and ductwork to keep the space tidy and free of clutter. Use moisture-resistant materials for surfaces and fixtures, which will extend the longevity of your setup. Remember, a well-thought-out layout combined with proper lighting and ventilation isn’t just about aesthetics—it’s about creating a functional, comfortable environment that elevates your sauna experience. By paying attention to these details, you’ll build a space that’s both practical and inviting, encouraging relaxation and convenience every time you use it.

Changing Room Metal Sign 8×12 Inch, Funny Aluminum Wall Decor for Bathroom Spa Gym Locker Room Restroom Sauna and Home Decor
Perfect 8×12 inch aluminum wall decor that solves the hassle of finding unique, stylish art for your bathroom…
As an affiliate, we earn on qualifying purchases.
As an affiliate, we earn on qualifying purchases.
Frequently Asked Questions
How Do I Prevent Mold and Mildew in Humid Environments?
To prevent mold and mildew in humid environments, you need to focus on moisture control and mold prevention. Guarantee proper ventilation by installing exhaust fans and opening windows regularly. Use dehumidifiers to reduce excess moisture, and choose moisture-resistant materials for walls and storage. Keep the space dry, clean, and well-ventilated, and promptly fix leaks or water issues. These steps will help you maintain a healthy, mold-free sauna-changing room.
What Are the Best Materials for Sauna-Changing Room Furniture?
For sauna-changing room furniture, you should choose moisture-resistant materials like cedar or teak, which handle humidity well. Opt for wood finishes that are sealed and waterproof to prevent damage and mold growth. These materials resist warping and decay, making them ideal for humid environments. By selecting durable, moisture-resistant wood finishes and materials, you guarantee your furniture stays sturdy, fresh, and mold-free over time.
How Can I Optimize Lighting for Relaxation and Functionality?
You can optimize lighting for relaxation and functionality by incorporating ambient lighting with dimmer switches. This allows you to easily adjust the brightness, creating a calming atmosphere or bright enough for changing. Use warm, soft LED lights to enhance relaxation and guarantee safety. Position lights thoughtfully around seating and storage areas, and consider indirect lighting to minimize glare and promote a serene environment.
What Safety Features Should Be Included in the Design?
Think of your sauna as a ship needing sturdy safety features. You should include clearly marked emergency exits and slip-resistant flooring to prevent accidents. These safety measures act like life vests and sturdy decks, ensuring everyone stays safe during their relaxation voyage. Prioritize easy access to exits and durable flooring to minimize slips and falls, making your sauna a secure sanctuary where relaxation meets safety seamlessly.
How to Incorporate Ventilation Without Compromising Privacy?
You can incorporate ventilation while maintaining privacy by installing discreet vents with privacy screens or louvers, which allow airflow without sacrificing seclusion. Using soundproofing techniques around vents minimizes noise disruption, ensuring a peaceful atmosphere. Position vents strategically to optimize airflow and privacy, and consider using acoustic panels or curtains that blend seamlessly into your design. This approach keeps the space well-ventilated, private, and comfortable for all users.

Sterilite 4 Shelf Cabinet, Lockable Utility Storage w/ Adjustable Shelves, Gray – Plastic Shelving Unit for Organizing Garage, Pantry, Basement, Laundry Room or Mudroom
Dimensions & Size: Exterior measures 25 5/8" x 18 7/8" x 69 3/8", with interior shelf dimensions of…
As an affiliate, we earn on qualifying purchases.
As an affiliate, we earn on qualifying purchases.
Conclusion
Remember, your sauna-changing room should feel like a sanctuary—a place where you can unwind and recharge. While space might seem limited, clever storage and thoughtful layout can transform it into a cozy retreat. Don’t let worries about clutter hold you back; with a little planning, you’ll create a relaxing haven that boosts your well-being. Embrace the process and enjoy the calming, rejuvenating atmosphere you deserve. Your perfect sauna space is within reach—start designing today!

Matane 12 Inch LED Flush Mount Ceiling Light Fixture with Night Light, 24W 2400LM 3000K/4000K/5000K Selectable, Dimmable Ceiling Lights for Bedroom, Dining Room, Kitchen, Round Black
NIGHT LIGHT FEATURE: This ceiling light comes with a separate night light mode, activated by turning off the…
As an affiliate, we earn on qualifying purchases.
As an affiliate, we earn on qualifying purchases.

Broan-NuTone Bathroom Exhaust Fan, 50 CFM Modern Grille, Energy Star Fan, 2.0 Sones
50 CFM BATHROOM EXHAUST FAN: 50 CFM is sufficient ventilation to remove, moisture, odor and pollutants from your…
As an affiliate, we earn on qualifying purchases.
As an affiliate, we earn on qualifying purchases.