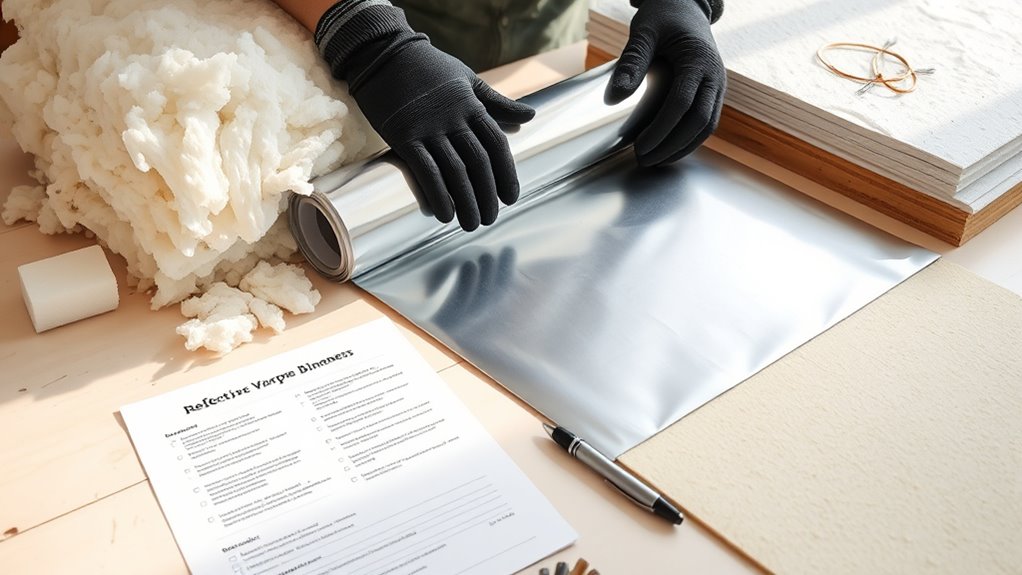

Before you start installing insulation and vapor barriers, assess your space to identify moisture-prone areas like basements or bathrooms. Measure wall cavities and check for leaks or damp spots. Choose materials suited for your climate and needs, such as fiberglass or foam board, and gather essential tools. Carefully plan your installation to ensure insulation fits snugly and vapor barriers are properly placed to prevent moisture buildup. Keep these steps in mind — and there’s more to learn to ensure a successful project.
Key Takeaways
- Assess moisture-prone areas and identify locations requiring insulation and vapor barriers.
- Select appropriate insulation materials and vapor barriers based on climate and building needs.
- Measure wall cavities, ceilings, and floors to determine material quantities.
- Ensure proper installation techniques, including snug fitting and sealing all seams.
- Focus on moisture control, continuous coverage, and sealing penetrations for optimal performance.

2 Pack R-13 EcoRoll ECO-Friendly 15inch Wide Kraft Faced Fiberglass Insulation Roll 3-1/2" x 15" x 32' 40 *(Packed by Eagle Electronics)
- Certification: GREENGUARD Gold certified, chemical-free
- Eco-Friendly Material: Made from natural, recycled, and eco-friendly binders
- Performance: Excellent thermal and sound insulation
As an affiliate, we earn on qualifying purchases.
As an affiliate, we earn on qualifying purchases.
Assessing Your Space and Planning Your Project

Before you start insulating or installing vapor barriers, it’s essential to carefully assess your space and plan your project. Start by examining areas prone to moisture issues, like basements or bathrooms, since proper moisture control is key to preventing mold and damage. Check for existing leaks or damp spots, and note where insulation might be needed most. Consider your climate and how insulation can improve thermal performance in your home, reducing energy costs. Measure wall cavities, ceilings, or floors to determine the right amount of material. Planning ahead helps you choose suitable insulation types and vapor barriers, ensuring effective moisture control and thermal efficiency. A thorough assessment sets a solid foundation, making your installation more efficient and long-lasting.
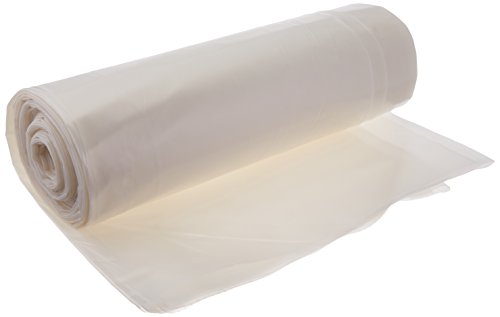
Frost King P1025/6W Polyethylene Sheeting, 10' x 25' x 6 mil., Clear
- Versatile Plastic Sheeting: Suitable for home, garden, garage
- Protects Items: Covers furniture, appliances, equipment
- Outdoor Use: Ideal for storm windows and building protection
As an affiliate, we earn on qualifying purchases.
As an affiliate, we earn on qualifying purchases.
Selecting the Right Materials and Tools

Once you’ve assessed your space and planned your project, the next step is selecting the right materials and tools. Focus on choosing insulation with appropriate thermal resistance to guarantee energy efficiency. For moisture control, select vapor barriers designed to prevent moisture buildup and mold growth. Your tools should include a utility knife, tape measure, protective gear, and a staple gun. Use the table below to help you compare options:
| Material Type | Key Features |
|---|---|
| Fiberglass | Good thermal resistance, affordable |
| Foam Board | High moisture control, easy to install |
| Spray Foam | Best thermal resistance, seals gaps |
| Vapor Barrier | Prevents moisture infiltration |
| Hand Tools | Cutting, measuring, safety equipment |
Selecting the right combination ensures effective insulation and moisture management. A proper understanding of insulation properties can significantly improve your project’s energy efficiency and longevity.

Green Foam Insulation Board 1/2" Thick (6 Pieces-1sqft Each) Foamular Boards for Craft or Home Improvements Projects Such As Window, Wall, Ceiling Coverings. Packed by Eagle Electronics
- Moisture Resistant Foam Board: XPS insulation, durable and non-crumbling
- Generous Size for Projects: 1 sq ft panels suitable for various uses
- High R-Value Insulation: R-2.8 for effective thermal coverage
As an affiliate, we earn on qualifying purchases.
As an affiliate, we earn on qualifying purchases.
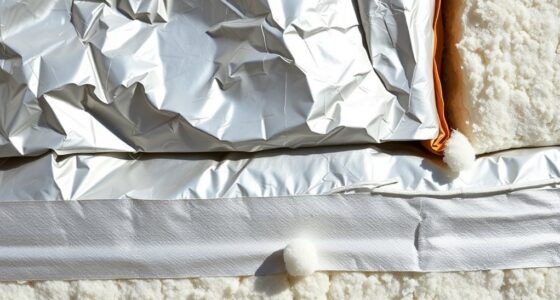
Understanding Proper Installation Techniques

Proper installation is crucial to guarantee your insulation and vapor barriers perform effectively. If not installed correctly, air leaks can develop, reducing energy efficiency and increasing heating or cooling costs. Ensure that your insulation fits snugly without gaps or compression, which can compromise its thermal value. Vapor barriers should be placed with the vapor side facing the warm interior to prevent moisture from seeping in and causing mold or structural damage. Seal all seams and edges tightly using appropriate tape or fasteners. Pay close attention to joints, corners, and penetrations to maintain continuous coverage. Proper installation techniques will help optimize moisture control and prevent air leaks, ensuring your insulation system works as intended and prolongs the lifespan of your building. Additionally, understanding the importance of proper installation can significantly impact the longevity and effectiveness of your system, similar to how best heat pump features contribute to reliable performance.

FCHO Car Sound Deadening Roller Metal 3 Pcs Roller Car for Installation
- High-Quality Materials: Wood handle with metal roller
- Complete Set: Includes three different sizes
- Efficient Operation: Corrugated metal wheel prevents slipping
As an affiliate, we earn on qualifying purchases.
As an affiliate, we earn on qualifying purchases.
Frequently Asked Questions
How Long Does Insulation Installation Typically Take?
The insulation process usually takes from a few hours to a couple of days, depending on the space size and type of insulation used. Your installation timeline can vary based on factors like accessibility and whether you’re doing it yourself or hiring professionals. You’ll want to plan accordingly, allowing enough time to complete the job thoroughly. Stay patient during the insulation process to guarantee proper installation and maximum energy efficiency.
Can I Install Insulation Myself or Should I Hire a Professional?
Think of insulation installation as a delicate dance—you can try it solo, but DIY challenges may trip you up. While you can install insulation yourself, hiring a professional guarantees precision, safety, and maximum energy efficiency. Professionals bring expertise, avoiding common pitfalls, and saving you time and hassle. If you’re comfortable with home projects and follow safety guidelines, DIY might work; otherwise, the professional benefits make the investment worthwhile.
What Are the Safety Precautions During Insulation Installation?
You should prioritize safety during insulation installation by wearing appropriate personal protective equipment like gloves, goggles, and a dust mask. Keep fire safety in mind by avoiding open flames or sparks nearby, especially when handling flammable materials. Make certain proper ventilation to prevent inhaling dust or fumes, and work in well-lit areas. Taking these precautions helps protect you from hazards and makes the process safer and more efficient.
How Do I Dispose of Old or Damaged Insulation Materials?
Think of it like passing on a legacy—dispose of old or damaged insulation responsibly. You should follow proper disposal methods, such as sealing it in heavy-duty plastic bags and placing it at your local waste facility, or exploring recycling options if available. Avoid throwing it in regular trash, as fibers can be harmful. Proper disposal keeps your home safe and supports environmental sustainability, honoring the effort you put into your renovation.
Are There Any Building Code Requirements for Insulation and Vapor Barriers?
Building codes and insulation standards set specific requirements for insulation and vapor barriers to guarantee safety and energy efficiency. You need to check local building regulations, which often specify R-value levels, vapor barrier types, and installation methods. By following these codes, you assure your project meets legal standards, avoids penalties, and maintains proper indoor air quality. Always consult your local building department before starting to ensure full compliance.
Conclusion
Getting your insulation and vapor barriers right can considerably boost your home’s energy efficiency. Did you know that properly installed insulation can reduce heating and cooling costs by up to 20%? By evaluating your space, choosing the right materials, and following proper techniques, you’ll create a comfortable, energy-efficient home. Don’t rush—taking the time to plan and execute correctly pays off in long-term savings and comfort. You’ve got this—happy insulating!